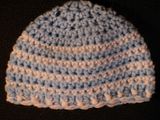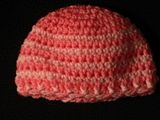
Since most of my prior hat designs are a bit “girly”, I had set out to design something for little boys. This is what I came up with.
Little Boy Blue Cap
2 colors of baby yarn (I used Bernat Softee Baby)
G hook
Main Color – color A
Contrast Color – color B
With Color A
Start with a magic loop
1) ch 2, 7 hdc in loop (8 hdc)
G hook
Main Color – color A
Contrast Color – color B
With Color A
Start with a magic loop
1) ch 2, 7 hdc in loop (8 hdc)
2) 2 hdc each st, join w/ slip stitch to complete row – (16 hdc)
3) ch 2, 1 hdc in same stitch, ( 1 hdc , 2 hdc next ) around, join w/ slip stitch – (24 hdc )
4) ch 2, 1 hdc in same stitch, ( 1 hdc in next 2 stitches, 2 hdc in next stitch), join w/ slip stitch – (32 hdc)
5) ch 2, 1 hdc in same stitch, ( 1 hdc in next 3 stitches, 2 hdc in next stitch) around – (40 hdc)
When joining – switch to color B – start your slip stitch as normal, but when you pull up your loop, pull up color B instead. Do not cut color A – let the yarn hang loose inside your cap.
When joining – switch to color B – start your slip stitch as normal, but when you pull up your loop, pull up color B instead. Do not cut color A – let the yarn hang loose inside your cap.
6) ch 1, sc around (40 sc), join w/ slip stitch and change to color A (let color B dangle)
7) ch 2, hdc around (40 hdc), join w/ slip stitch and change to color B (let color A dangle inside work)
8-13) repeat rows 6-7
at the end of row 13 do NOT change colors – you will be working with color A
(the last row of the pattern may be a bit challenging for beginners. You will be doing alternating stitches with color A and color B. All of your stitches with Color A will be hdc, all of your stitches with Color B will be Back Post HDC. You can find an online tutorial on how to do a back post hdc here.)
14) With color A chain 2 (this counts as your first hdc), now switch to color B and do a Back Post hdc in the next stitch, pick up color A and do a hdc in next stitch. Continue this pattern all the way around – this will create a ribbed edge to the hat with each stitch alternating between colors.

I called this hat Little Boy Blue, but little girls can wear it too!

As written, this cap is for newborns, but it can easily be modified for larger kids or adults. Just adjust the size of the crown as needed before starting the pattern rows. By making the crown larger, and by adding pattern rows as needed, this hat can be made in any size you desire.
Please feel free to use this pattern for charity and/or personal use.
I ask that if you use this pattern please donate one finished cap to:
Marine Corps Kids
1570 LaCosta Drive West
Pembroke Pines, FL 33027
Please feel free to use this pattern for charity and/or personal use.
I ask that if you use this pattern please donate one finished cap to:
Marine Corps Kids
1570 LaCosta Drive West
Pembroke Pines, FL 33027
You can read more about Marine Corps Kids here.


1 Comments:
I love it! Cute and boyish :)
Post a Comment
<< Home