Friday, July 29, 2011
Free Pattern - Pooper Scooper Bag Caddy

When you get a dog, your need for plastic bags goes up. They have business to do, and we have to clean up after them. I keep a stash of plastic bags and Lola’s leash by the front door, and every time I take her out I grab a bag or two.

I generally stuff the bag or bags into my pockets, but then I thought – I crochet! Why not make a little caddy to carry the bags that will hang from the leash. In just a few minutes and a bit of scrap yarn I was able to make a cute caddy.

I use standard grocery store plastic bags to clean up after my dog. The small caddy easily holds 2 bags. If you use smaller bags (like from the newspaper) you can probably fit 3-4 bags in the small size. The larger size is still small enough to hang from the leash, and will easily hold at least 3 grocery bags. This keeps my pockets free, and helps to ensure that I always have bags when I need them.

Supplies:

¼ inch elastic

Thread and sewing needle

Small amount of crochet cotton (I used Sugar ‘n Cream – ¼ skein is more than enough for one caddy)

G Hook

For smaller caddy.

Cut 2 pieces of the elastic to 2.5 inches each.

Sew edges together to form elastic loop

Row 1: Crochet 20 SC stitches into one of the loops so that the yarn covers the loop. Join

Rows 2-9: Chain 3 (counts as first DC). DC in each stitch around. Join with slip stitch.

Row 10: Holding the second elastic loop behind your stitches, SC around catching the elastic in your stitches. Join with slip Stitch.

Row 11. Chain 40. Slip stitch into last stitch in row 10 to create a loop handle.

Fasten off and weave in ends.

For Larger caddy.

Cut 2 pieces of the elastic to 3 inches each.

Sew edges together to form elastic loop

Row 1: Crochet 25 SC stitches into one of the loops so that the yarn covers the loop. Join

Rows 2-10: Chain 3 (counts as first DC). DC in each stitch around. Join with slip stitch.

Row 11: Holding the second elastic loop behind your stitches, SC around catching the elastic in your stitches. Join with slip Stitch.

Row 12. Chain 40. Slip stitch into last stitch in row 10 to create a loop handle.

Fasten off and weave in ends.


Tuesday, July 26, 2011
A great visit


Yesterday I got to meet my new great-niece, Cecilia, and to visit with her big sister, mom and nana. I hadn't seen them all in almost a year, so it was great to have some quality time together and get some yummy Olivia hugs.

In the photos you can see baby Cecilia with her new hat and her new Stuffy Bear. The bear is bigger than Cecilia, and probably weights more than she does.

Olivia seemed to like her new stuffed bunny. She is such a gorgeous child and I always love visiting with her.

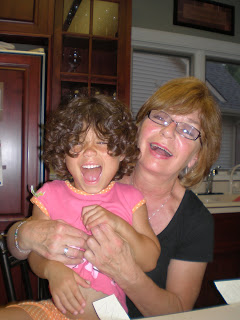
You can also see Cecilia snuggling with her mommy, Olivia laughing with her Nana, and a photo of the nursing cover that I made for Jessica. I am not good at sewing so I'm glad the seams don't show in the photo, but the design of this cover is a good one.

Hope to get a chance to see everyone soon. As Olivia would say, "I love my peoples!"


Friday, July 22, 2011
Olivia's Bunny


I'm planning a quick trip to meet my new Great-Niece Cecilia. I believe I've already commented on how gorgeous she is, but just in case you missed it, here are some more photos of her and big sister Olivia.

I made Cecilia a stuffed bear, but couldn't possibly bring a stuffed toy for Cece without bringing one for Olivia! This is Olivia's bunny. I'll leave it to her to name it. I used this pattern to create this bunny. While I think the bunny is really cute, I did not enjoy making it. It was truly a labor of love. There are a lot of single crochet stitches in bunny, and it took me several tries to figure out how to get the feet right (although once I got them I realized the problem was really me and not the pattern - I just struggled with them for some reason). Hopefully Livie will like it, and that makes it all worth while!


Monday, July 18, 2011
Loop Stitch

A few years ago I tried to follow a crochet pattern that called for the loop stitch. I struggled with it, and never mastered it. Since then, I've always avoided pattern requiring the loop stitch. I watched several tutorials on You Tube, but none of them made the stitch workable for me.

Then today I found these easy instructions. They are not really different from the other tutorials I've followed, but for some reason, these instructions made it make sense. I'm making loop stitches, and they are actually looking even and plush!!!

If you've been struggling with Loop Stitch, try these Crochet Me instructions!


Friday, July 15, 2011
Cece's Bear

I just finished Cecilia's bear. I think she's sort of funny looking, but that's a good thing in bears. She's big and huggable, and hopefully, Cece will love her!

I'll leave it to Cece and her parents to name the bear.


Wednesday, July 13, 2011
Bear embryos


Five years ago I made Stuffy Bear for my great-niece, Olivia. Stuffy was one of my first stuffed animals. While I was making him, I had no faith that he would turn out well. In the embryo stage he looked like an eggplant. Then I put a face on him and he sort of looked like a baby harp seal. In the end he turned out pretty cute. Olivia loved him and slept with him every night until his stuffing just collapsed and he turned into a flat pillow with a face.

Now Olivia has a baby sister, Cecilia, and I would be a bad Aunt if I didn't make a bear for her too. I tried to use fluffy yarn (similar to what I used for Stuffy Bear) and it was impossible to work with. I couldn't see the stitches, and the bear ended up with a large bulge in an unfortunate location - totally inappropriate for a baby! I went out and bought some Baby's First yarn by Lion Brand. It's not fuzzy like stuffy bear, but it's soft and pink.

As I worked with the yarn, I realized that the new bear was going to be larger than Stuffy. She's also rather lumpy looking. I began to despair as the bear developed a lumpy belly and a pointy head. I was ready to give up, but my husband told me to go on. I frogged the top of the head, reshaped it to be a bit more round, and sewed on the snout. I still wasn't thrilled, so I decided to give her her face. Tada! Now she's cute! All she needed was a face!

I have to still make her arms legs and ears, and I'm out of stuffing. I hope to buy some more stuffing tomorrow and get this bear done in the next few days.

Then, if all goes as planned, I can go visit Olivia and meet Cecilia and deliver this bear in person!


Monday, July 11, 2011
Today's lesson....


... I don't like sewing. I'm not good at sewing, I don't have the patience for sewing, I don't enjoy sewing. Furthermore, I've reached the age when threading the eye of the sewing machine needle - even with my reading glasses - is a difficult challenge.

I wanted to do some sewing today. I had big plans.

First, I wanted to sew my last failed weaving project into a small purse. I managed to do that. Then I purchased a small piece of fabric to line the purse with. Sewing the lining was a disaster. It pulled, and caught and was ruined. So, alas, this little purse has no lining. I don't know what to do with it now. I'm thinking that it might be ok for a child - though I wouldn't have made it in black for a little girl - so I may donate it to Marine Corps Kids for one of the older girls.

Then, I wanted to sew some nursing shawls for Marine Corps Kids. A few months ago some fabric was donated, and none of our sewers has claimed it yet. I thought I could make some nursing covers with it. I found a few patterns on line that looked simple and figured I could do it. It is simple - and I could do it, but I took shortcuts. I didn't properly iron the fabric first, and that would have made hemming so much easier.

Anyway, I finished the shawl. It came out ok. One of the patterns I found uses overall clips for the neck strap. Figuring that with clips I would only have to sew one strap instead of two, I decided to use the overall clips. I had a lot of trouble attaching the button. I had to call in my husband and his tools. He finally got the button to snap over the fabric, but it was too heavy for the cotton and ripped a hole in the cover. :( Refusing to waste donated fabric, I sewed the hole up, found a traditional button that would fit in the hook, and attached that.

In the end, I have a useable nursing cover. I love the design - it uses a small piece of boning in the top hem so that mom has a small window to look down at baby without sacrificing privacy.

This flowered shawl will be going to Marine Corps Kids.

I want to make at least one more to give to my niece who just had a baby girl. This time I will use this pattern which uses D rings instead of the hook. It will mean I have to sew one more strap, but I think will be easier in the end. If I take my time and iron the hems before sewing, I think it will be an easy pattern.

I'm going to post this on the Marine Corps Kids site. For any sewers out there - this is a great item to donate to Marine Corps Kids. I think any nursing mom would love to have one of these covers.


Big Sister, Little Sister


I just finished these two crocheted hats for Olivia and Cecilia. Olivia is my 4.5 year old great-niece, and Cecilia is her newborn little sister. I haven't met Cecilia yet, but I hope to meet her really soon.

The hats were made with cotton yarn using the Petite Purls pattern. The flower fabric and buttons on the two hats are the same. I hope they're not too big for the girls, but if they are they'll grow into them.

As you can see form the photo, Olivia is very happy being a big sister. She's an absolutly beautiful girl - both inside and out! I may be a bit biased, but I don't think anyone would dispute the fact that she's a living doll. Little Cecilia looks just like Olivia did when she was a baby. Two gorgeous girls!


Sunday, July 10, 2011
Making lemonade of lemons

Sometimes the best of plans fall short. I bought some beautiful yarns that I thought would all work together to make a gorgeous scarf. I warped up the loom and started weaving only to find out that I was wrong. One of the yarns that I chose for the weft was overpowering the warp yarn, and the whole thing looked bad. I wove about 6 inches, then unwove the whole thing to try plan B.

Plan B involved using the same yarn for the warp and weft. That actually looked great, but I didn't think I would have enough yarn to finish the scarf, so I decided to do stripes. After weaving about another 6 inches, I hated that too, and unwove the whole thing again.

Then I wove the yarn with just a few thin black stripes. Didn't like that but decided to do just a few stripes on each end and keep going. I liked the fabric that I was creating, but quickly realized that I didn't have nearly enough yarn to complete a scarf.

I searched my local yarn stores and the internet, but the yarn I needed seems to no longer be available.

Ok..... plan C. I wove as much as I could. It seemed to be enough to fold into a small purse. So I decided to end what I had, continue to make a thin strap, and then assemble into a purse.

Well, I stared weaving just the first inch of my warp to create the strap, and it looked horrible. The weave was messy and uneven, so I gave up on that as well.

In frustration, I cut the whole thing of the loom. That's when I realized just how much warp yarn I was wasting. I saved the long strands to use as contrast yarn in a future project. The small piece that I created is just enough to sew into a small purse. I'll but some black cord from the craft store to use as a strap, and that will be that. I don't think this is something that I would use, but I'm sure that there is someone out there somewhere who might like it.

Here's what it looks like now. I'll post a photo later when I get it sewn into a purse.


My Loot!

Last weekend a friend and I went to Sheep Street for their open house. I love going to Sheep Street! It's a wonderful local yarn store on a working sheep farm. We got to shop all the lovely yarn and visit the barn to see the sheep and the alpacas.

They were having an open house and a silent auction to benefit the local humane society. They hoped to get $600 in donations for the Humane Society, but ended up with $1100 to donate!

I was a double winner! In the silent auction I won a gorgeous hand-made shuttle for my loom, AND I won a door prize for a $25 gift certificate! My friend, Lynne, also won two items in the silent auction.

We went back there today to pick up our loot. I used my gift certificate to buy some absolutely gorgeous Araucania Patagonia cotton yarn in reds. I'm going to weave this into a shawl and keep it for myself! I can't wait to work with this yummy yarn! It's so soft and beautiful and I just LOVE the color. They call it Reds, but it's really shades of pink, salmon and brown. I think it should be lovely to weave with!

The shuttle that I won is really beautiful! It was handmade by Couch's Little Workshop. It's a new business and they are obviously still working on their website, but they seem to do wonderful woodworking! I'll be checking back on their website to see more about them.

It's very rare that I win anything, so this was a big thrill! I can't wait to work with my new shuttle and yarn!


footer2.JPG