
The loopy edging on this blanket seems to be well received, and I had fun with it, so I wanted to share the pattern - it's quite fast and easy!
This blanket was made with the Edgerydoo. You can use it for any edging project with or without Edgerydoo (though I don't think I'd have the patience to do one without!)
Pierce the holes in your fabric and do a simple single crochet and chain one in each hole. At the end, join with a slip stich to complete the round.
For the next row, HDC all the way around and join with a slip stitch.
Finally for the loops, chain 8, skip 3 stitches and do a sc in the next stitch. Then *chain 7, skip 3 stitches and do a sc in the next stitch. Follow the pattern** around to the end and slip stitch into the first stitch of your first chain 7. At the end of this round you will have loops or arches all away around the piece with 3 "not used" stitched under every arch.
Now, slip stitch into the next two stitches (so you are in the middle stitch under the first arch). *Remove your hook and pull the empty loop through the arch to the back of the project. Put the hook back through the loop, chain 8, pull the chain back to the front of your project and sc into the empty center stitch under the next loop.* Repeat ** pattern all the way around, and join to your first stitch to finish.
Cut your yarn leaving a 3 inch tail, and weave the end back and forth through your work. You're done.
In the end you will have interlocking loops. By going from the front of the project, through the "arch" and back to the front, you interlock the loops so they form a loose twisted look and aren't too loose and floppy (don't want tiny fingers getting tangled).
Hope you like this look!
The blanket shown above (and a matching hat) were donated to Operation Marine Corps Kids. If you like this pattern and enjoy using it, please consider donating an edged blanket or hat (and any other baby item) to this great cause.
Please feel free to use this pattern for charity and personal use. You may link to this pattern, but please do not post it elsewhere without permission.
August 3, 2007
Shelly left some comments asking me to better explain the last row of this pattern. I asked my hubby to take some photos that I hope will help to illustrate how to do the interlocking arches. It's quite easy when you get the knack of it.
What Shelly was questioning was how to keep the "feeder yarn" behind the pattern, when you're working the loop from the front of the pattern. Basically, just hold the feeder yarn behind your work and it works. I did a simple edging to show the process, I hope these illustrations help (the photos are all clickable)....
When you start the last row you will have a row of arches like this:
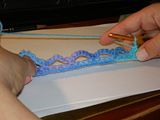
Holding the feeder yarn behind the arches, slip stitch into the first stitch,
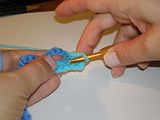
then do a sc into the next stitch (which is in the middle of the arch). Remember to work from the front, but keep the feeder yarn in the back:
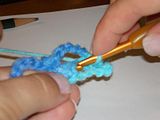
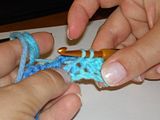
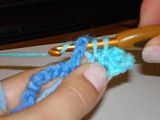
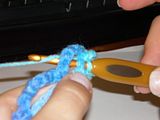
as you can see, you are working the sc through the arch from the last round. Pull up your loop from the back to the front. Elongate the loop:
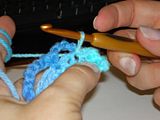
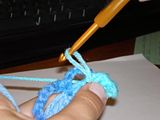
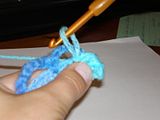
Now, remove your hook, and working from the back of your work, put the hook under the first arch, reinsert the hook through your stitch loop, and pull the loop to the back of your work:
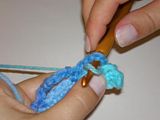
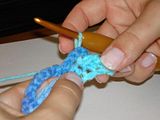
now, working from the back, do your seven chain stitches:
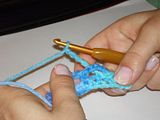
working again on the front side of your work, sc in the middle stitch under the next arch. Repeat this all the way around your work
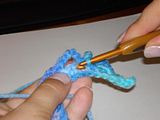
when you're done, your loops will interlock.
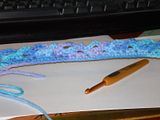
Hope that helps!


16 Comments:
The edging looks really nice on this piece..
Hello Wormie,
I found your site from the Edgiedoo site and really love the edging on this blanket. I am having a little trouble with the 3rd row and was hoping you could offer some clarification for me (I am still somewhat of a newbie to crochet). I am just not sure how the second loop intertwines with the first loop. I can get the first part of step 3 going it looks good but when I go to repeat the step I must be doing something wrong.
thanks!
Hi Shelly,
I'm sorry you're having trouble with this, and I hope you find my response. It's really fairly simple to do once you "get it", but its not easy to explain. I'll try.
When you do the first set of loops, you have little arches all the way around the blanket. Under each arch you have 3 unused stitches. You are basically doing another set of arches from the middle of one arch to the middle of the next.
The part you are having trouble with is the interlocking part. After you finish the first set of arches, you want to slip stitch to the middle of the next arch. What I do is pull the loop on the hook really long. Then I take my hook out and re-insert it into the loop from the back of the arch. Then continue with your chain and sc into the middle stitch under the next arch. Again, pull the loop on the hook to elongate it, take the hook out, and put the loop back on the hook from the back of the work.
If you follow these instructions the loop will go to the back of the first arch and then re-attach at the front of the next.
I hope this helps. If not, please leave another comment and I'll try to post some pictures in a new blog entry to help explain.
That did help but I think what is throwing me is how I deal with the feeder thread (I don't know what the true term is). After I attach the first of the 3rd row arches then I can't bring the feeder thread to the back with the arch. In order to get it completely in the back I would have to be able to push the whole ball of thread through the arch along with the loop. That is what makes me think I lost on intertwining the arches, I end up tangleing the feeder thread in the arches. I have a pic I can send you of where I am running into problems. Thanks for your help! Shelly
Shelly, you almost have it! Keep the feeder thread behind your work. When you do the first sc under the arch you are working from the front, but keeping your feeder thread in the back. When you pull up that first loop, you put the hook through the front, but pull up the loop from the thread in the back so you are working under the arch. Then when you take out he hook, you go to the back and re-insert the hook from the back.
Your sc are always from the front of the piece, but your feeder thread is always behind. After the sc is made in the front, you are technically working the chains from behind. Does that help?
This is where I am having problems. I sc into the middle of the first arch then pull the loop on the needle large, remove the hook, push the loop back behind the arch, reinsert the needle and then chain 8, at this point I have the feeder thread right next the 8th chain(at the top of the chain) which I then bring to the front over the first/second arch. This inadvertently brings my feed thread over to the front too. After a couple of these I just end up with a big tangle. I can't seem to figure out how to keep the feeder thread behind when I bring the chain over the top of the arches.
I am sorry to be such a pain in the butt, all the steps up to this point have been easy but I can't seem to wrap my head around this or I am doing something wrong. I tried searching online for any other reference to this type of crochet but come up empty handed. :)
Hi Shelly,
Hhm. I completely understand what you're saying, and I think I'll need to post some pictures to illustrate it. I'll try to do that tomorrow and make a new blog entry. I've done a few blankets with this edging, and haven't had a problem, so I'm sure if I can show you it'll be easy.
Check back in the next day or two and I'll post something for you.
Shelly,
I added photos to this post. I hope they help explain it better!
Good luck!
:)
Thank you so much for posting the pics. They really helped and I think I have it. I hold the feeder thread back in between the first row of arches so that it doesn't pull the existing arches down when I pull the second arch over the top. Of course mine don't look as good as yours but I hope the will change with practice.
I do have one more question, at least for now, where do you find your edgings or do you make them up?
Thanks!!!!!
Shelly
Yay, Shelly!
I'm so glad that this helped, and I'm sure yours looks GREAT! Yep, you work from behind working through the arches - not over them.
This edging I just made up. Sometimes I use the blanket edgings from patterns for other crochet blankets, sometimes I just wing it doing a few rows around or doing shells. Whatever strikes my fancy.
Would love to see pics of your work! Have fun!
I have seen this and love the different things that can be made with it. My question to you is...does the material always have to be like the fleece shown or can it be used with lighter fabric?
Charlene
Hi Charlene.
I have used EdgeryDoo to edge some little t-shirts and it worked. The great thing about the fleece is that it doesn't unravel so no sewing is necessary. You may be able to use other fabrics but I would think you would need to sew hems. You can ask the question at www.edgerydoo.com they are the real experts.
Hi Wormie...
I just finished the edging on the burper I was making and here are some photos. Sorry, most of them are blurry, I used my husband's camera and am not used to it.
Did you use crochet yarn or thread for your edging? I used thread and that might be why mine looks a bit different and I had such a hard time. When you sent me the detailed pics I went used some spare yarn to do a test piece and it really helped.
Well, now I am off to do finish the edging on 2 more burpers and I hope to use some of the other edging patterns on your site, I really like them :)
As a thanks for all of your help and that you happily share your patterns I would like to make a baby blanket and donate it to the organization of your choice..just let me know which one!
Thanks again..Shelly
Oh yea, here are the links to the pics of the burper:
http://picasaweb.google.com/shelly.garland/
Burper81207828PM?authkey=FwOg3P-Lb_c
Hi Shelly,
I can't view your pics, but I'm so glad that you were able to figure it out! I would love to see your photos - you can e-mail them to me at wormswords@gmail.com
If you want to donate something to charity, think about Operation Marine Corps Kids. http://marinecorpskids.blogspot.com/
It's a charity group that I started with a friend of mine - I think its a great cause!
Thanks!!
just starting this would love some help not sure were to start blanket has holes in it so what do I do now
Hi Jayne.
If you already have the holes punched in your fabric, the hard part is done. You want to start anywhere on the blanket - do a long sc in any hole, chain 2, and do a long sc in the next hole. Do that all the way around and join with a slip stitch.
Then continue with the pattern.
You can see how the basics are done on the Edgerydoo site.
http://www.edgerydoo.com/howitworks.html
Good luck!
Post a Comment
<< Home